How to center a title page in word? You’re in the process of writing a document in Word, but you’re not sure how to create an impressive cover page. Don’t worry, this article will guide you on how to create a cover page in Word!
– Notes when creating a frame for a cover photo in Word:
+ The created page frame should match the content of the article.
+ Don’t frame pages with too much detail.
+ The frame color must match the cover color.
– The following instructions are shown on the 2019 version of Word. For other versions of Word, the steps are similar.
How to center a title page in word?
– Step 1: Adjust page margins
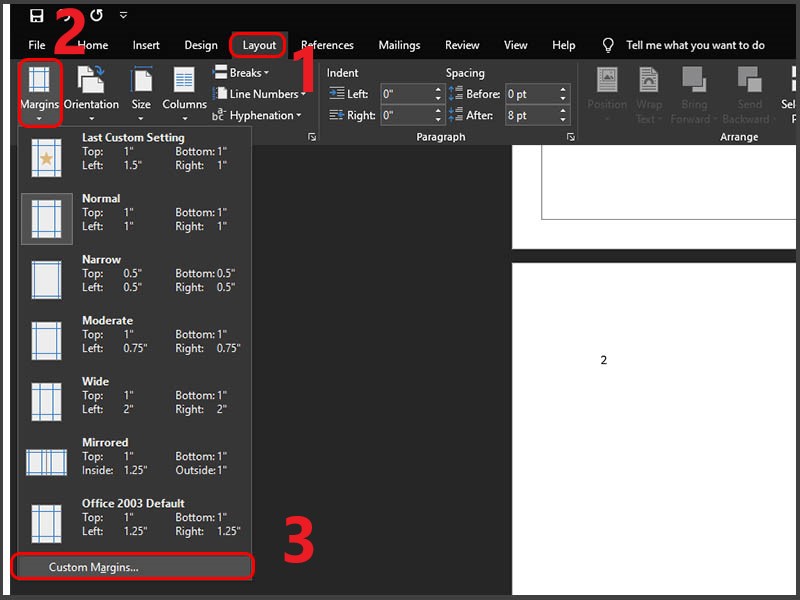
First, select Layout > Select Margins > Select Custom Margins.
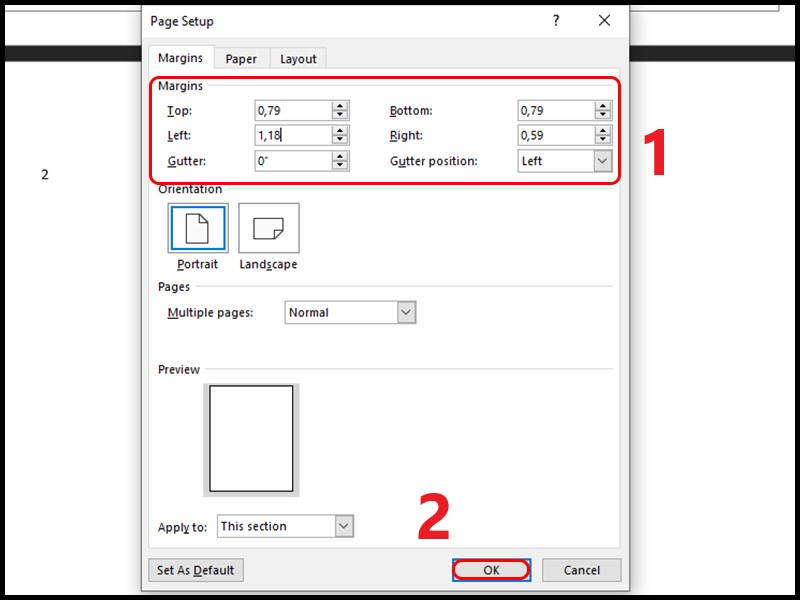
Then, customize the page margin parameters > Click OK.
Standard margin parameters:
- Top alignment: 2cm – 2.5cm (0.79″ – 0.98″).
- Bottom alignment: 2cm – 2.5cm (0.79″ – 0.98″).
- Left alignment: 3cm – 5cm (1.18″ – 1.38″).
- Right alignment:5cm – 2cm (0.59″ – 0.79″).
– Step 2: Adjust the border
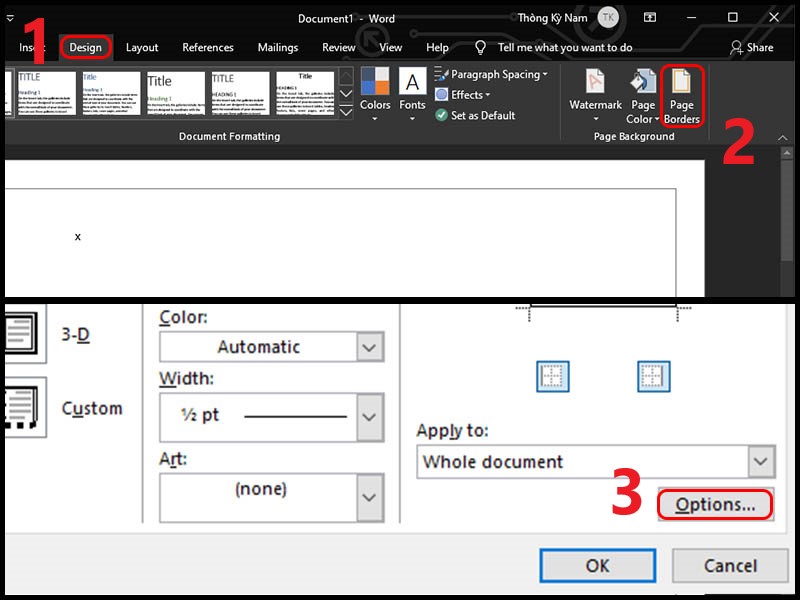
First, select Design > Select Page Borders > Select Options in the dialog box.
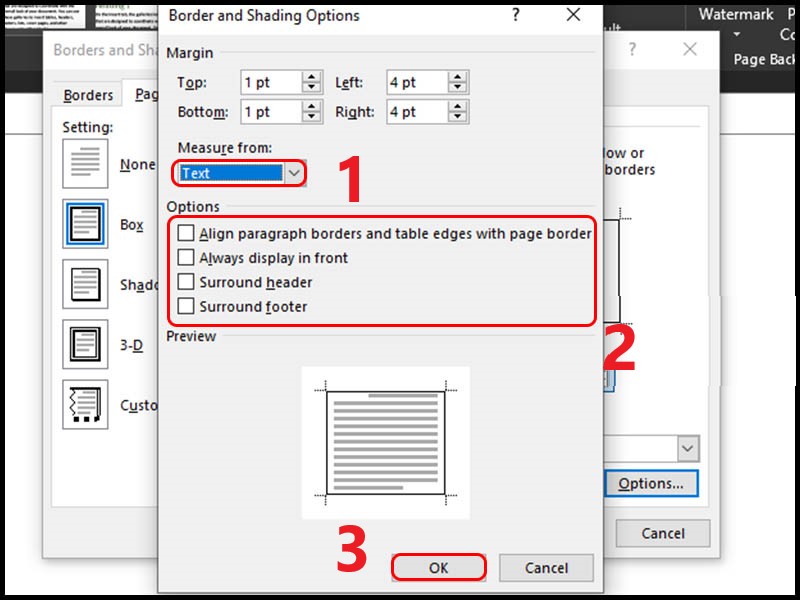
In the dialog box, select Text in the Measure from > section Uncheck all cells in the dialog box> Click OK .
– Step 3: Create a border
In the Page Borders dialog box, Select the Box > Customize the frame style to your liking, > Select This section under Apply to > Click OK.
Note: You must correctly select the page you need to frame the border, if you do not click on the page, Word will automatically create a border for all pages in the file.
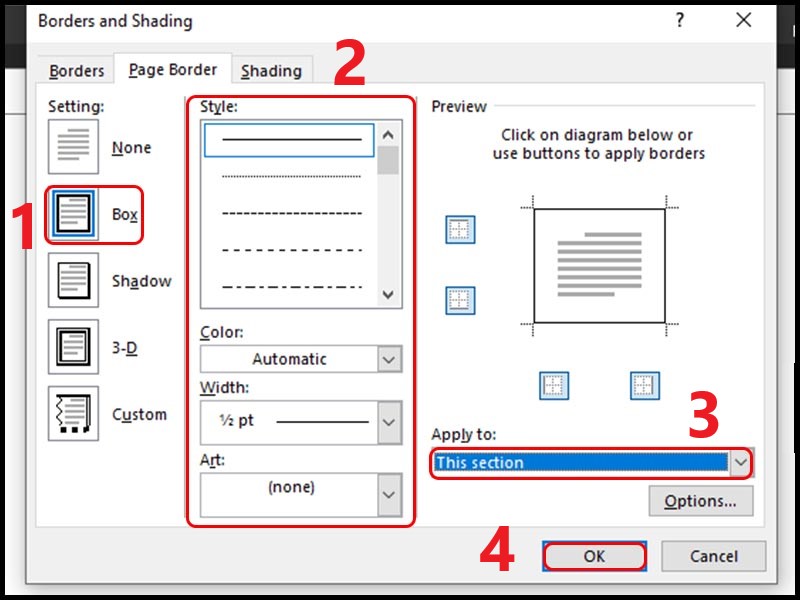
Above is a tutorial for creating a border frame in Word. Thank you for your interest!