How to compare two word documents side by side? If you’re an office worker, you shouldn’t miss this article. This extremely useful article will show you how to compare two Word documents easily to find the differences on your computer, helping you complete your work more quickly and efficiently.
Why compare 2 Word documents?
When you work with and back up multiple versions of a document on your computer, it can be challenging to identify which one is the primary and which ones are backups. Comparing these Word documents in parallel to obtain the most complete and up-to-date version is essential and can be done quickly.
How to compare two word documents side by side? Compare with Compare
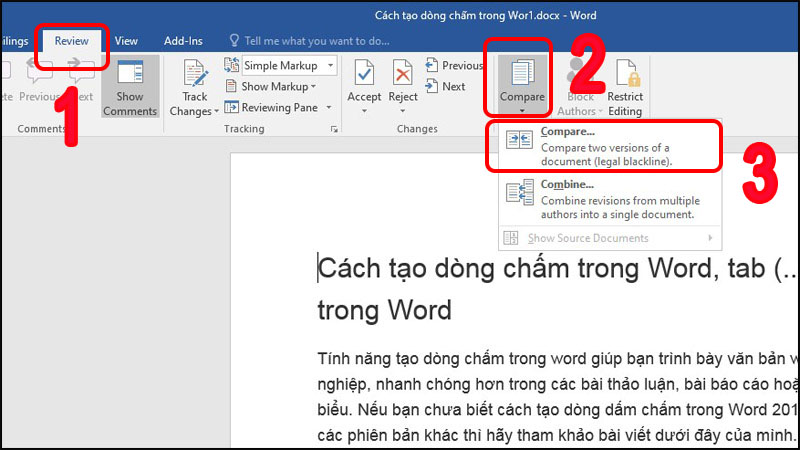
Step 1: Open Word on your computer, click Review > click the Compare icon > select Compare.
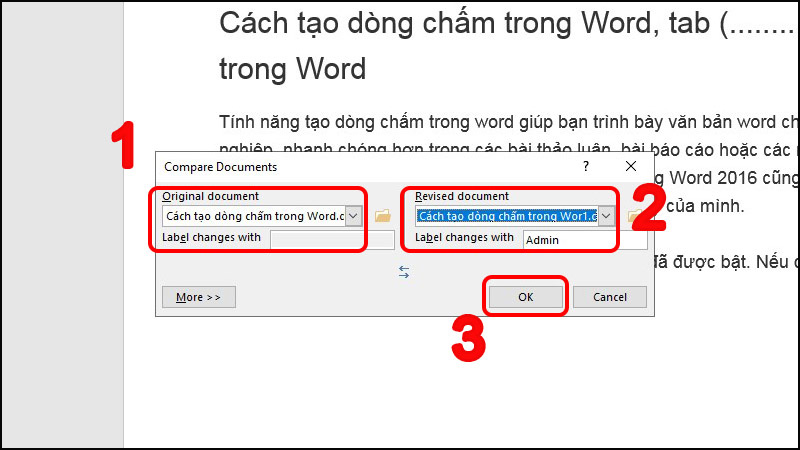
Step 2: The Compare Documents dialog box is opened > In the Original Document section, select the original text file > In the Revised Document section, select the comparison text file > Click OK.
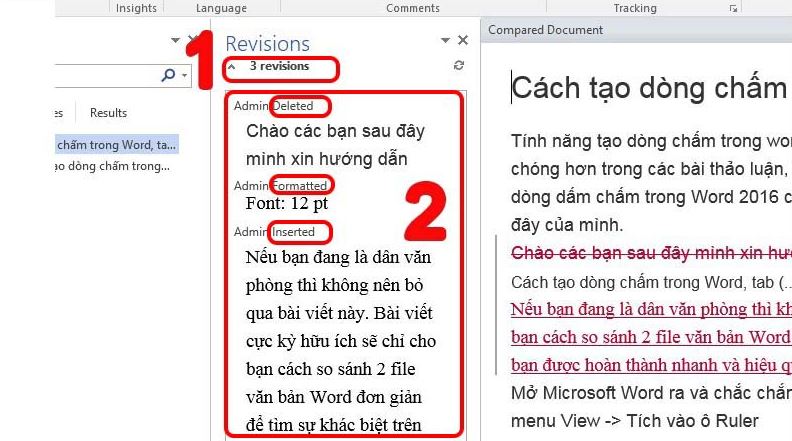
Options in the Compare Documents dialog box
– Section (1): Display correction information, editing operations and editors.
– Section (2): General display of original and edited text.
– Section (3): Display the original text.
– Section (4): Display Edited Text.
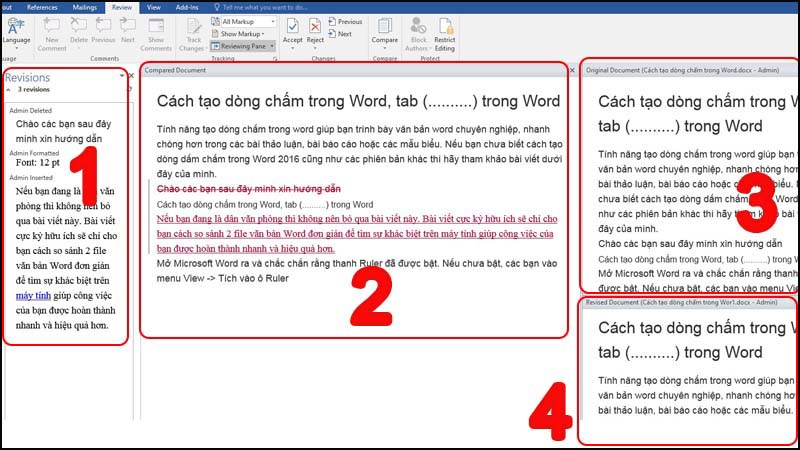
A closer analysis of section (1), section (2).
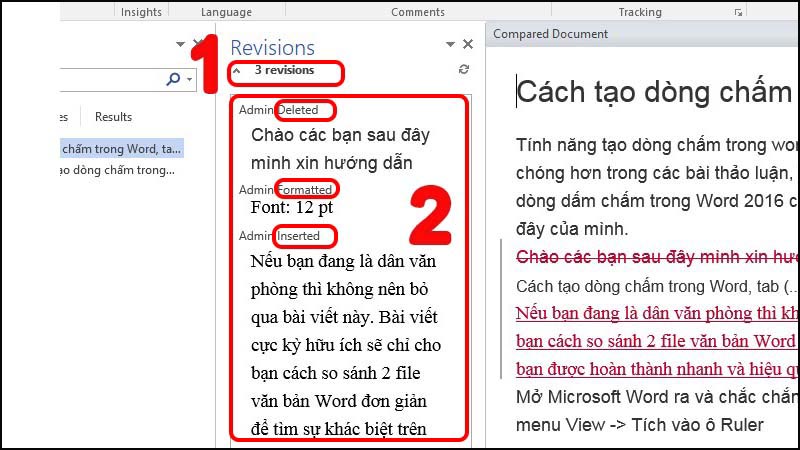
– Section 1: Show details of edited information.
Example: Total number of reviews is 3 revisions.
Editing operations such as Deleted, Inserted,… And the operation on which word, which line is displayed in great detail.
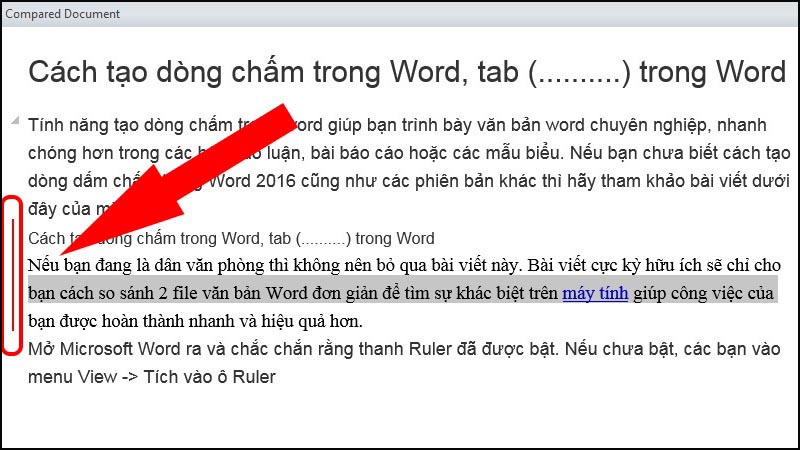
– Section 2: Edited text highlighted in red in left margin of text.
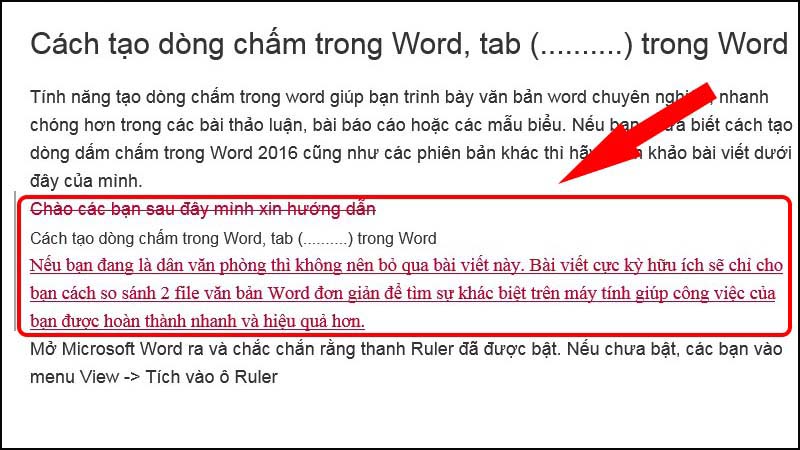
Left-clicking on that red dash will display the information to be edited (red letters).
In addition, you can change 1 number of options when comparing text as follows:
– Click the Tracking extension > Select Advanced Options > Click OK.
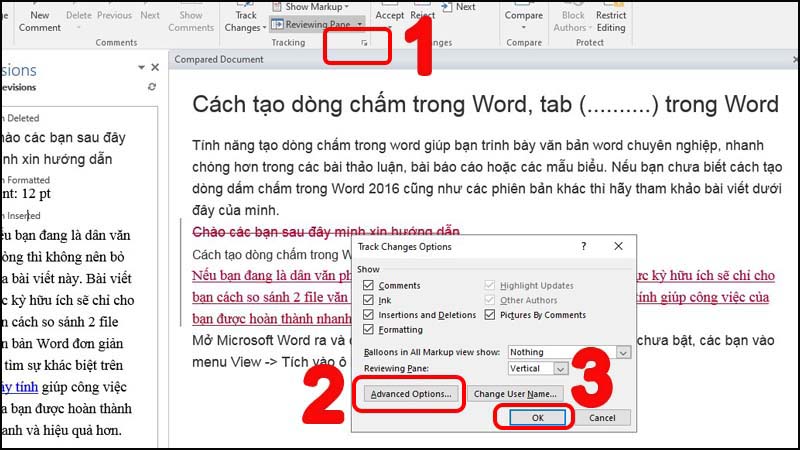
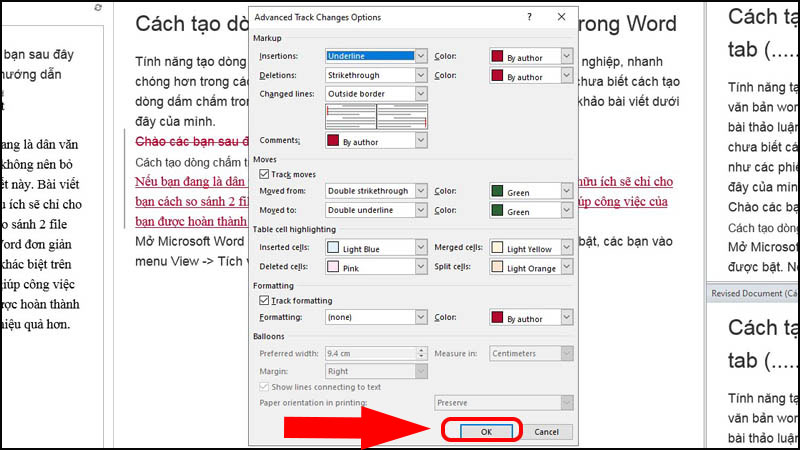
– A dialog box appears > There are options such as edited message lines, display colors, > Click OK to finish.
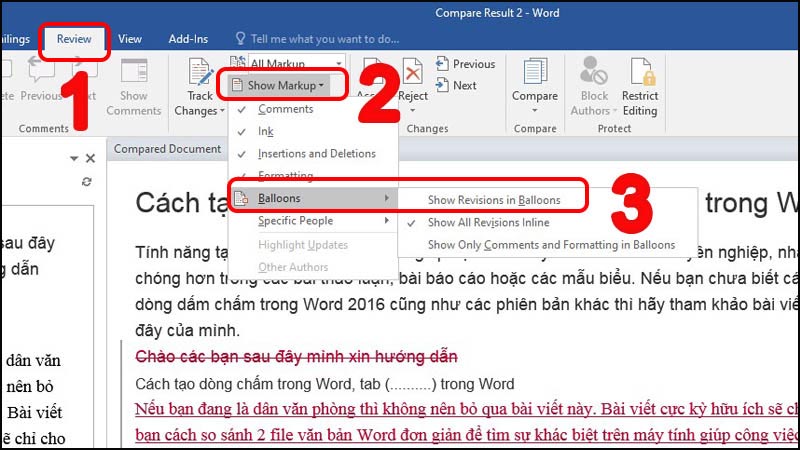
You can also adjust how Word displays changes in the document, for example you want them to be displayed as “bubbles”, go to Review click Show Markup, point to Balloons and then Show Revisions in Balloons:
After installation, your Word will display as shown:
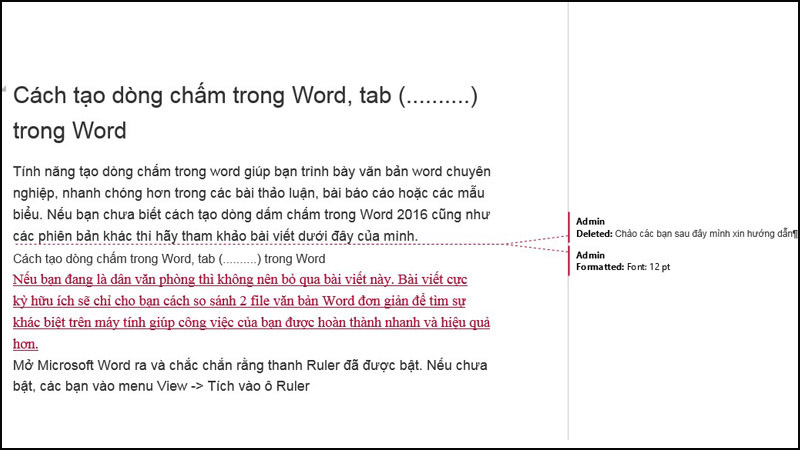
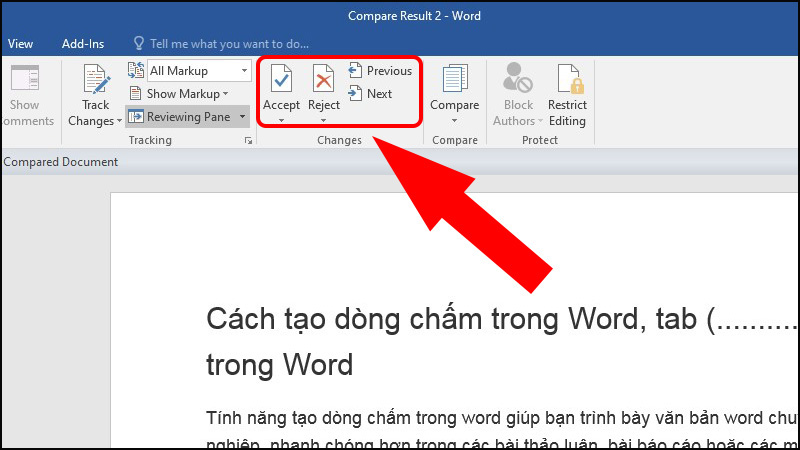
You can click the Previous or Next button to move the changes in the document back and forth to click Accept or Reject to accept and reject the changes at each step each time. Save the document when you have finished editing and are satisfied!
How to compare two word documents side by side? Compare with online tools
Compare by Diffchecker
An effective online comparison tool not only in text but also images as well as PDF files is Diffchecker. The tool can also be installed on computers and will be able to add the option to compare folders with each other.
How to use:
– Step 1: Access the tool HERE.
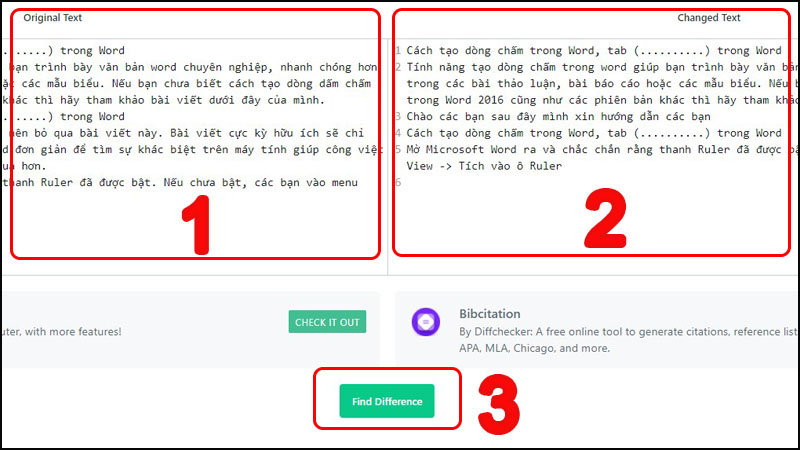
– Step 2: Copy and paste the original content into the Original Text and the changed content into the Changed Text > Select Find Different to find the difference.
– Step 3: Compare assets.
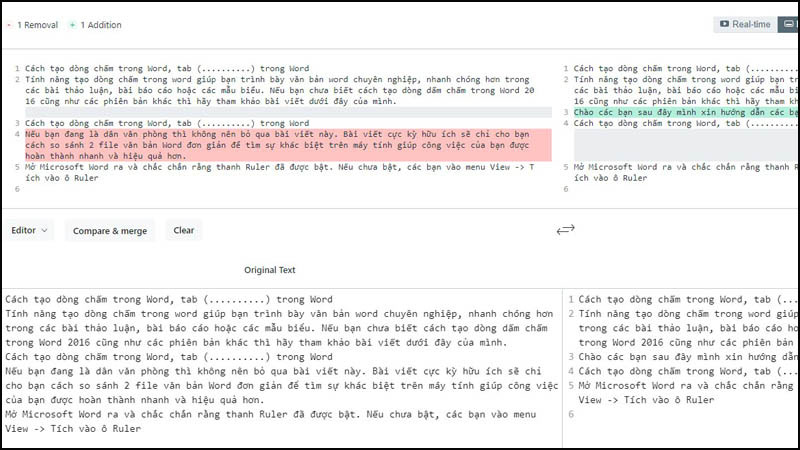
Explain some of the keyboard shortcuts available on the software:
+ Editor: allows you to edit the text you originally wore into Orriginal Text and Changed Text.
+ Compare & merge: is compare and merge, which means that when you click on it, the software will automatically merge 2 texts under your operation.
+ Previous and Next: are 2 keyboard shortcuts that allow you to move up and down to select mismatched text and merge.
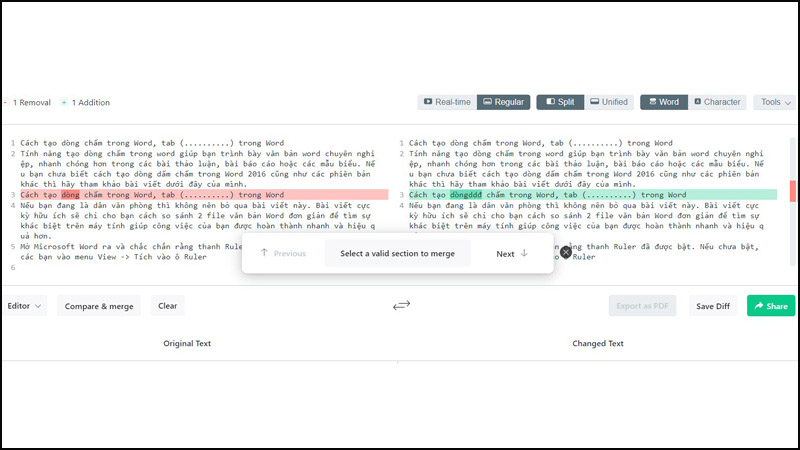
+ Clear: will wipe all the data and text you pasted in the previous operation.
+ Export as PDF: Save files as PDF and can only be used on Desktop.
+ Share: share the link.
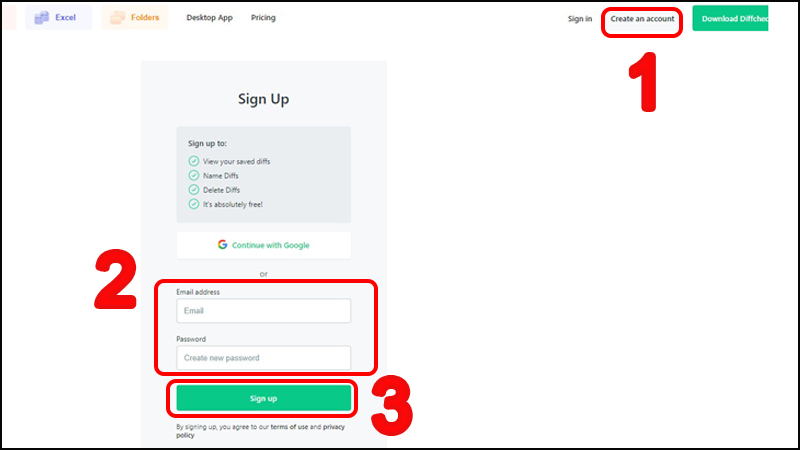
You should create a Diffchecker account so that you will be able to save drafts or correct mistakes from the original.
How to create an account: Click Create an account > Enter the email and password you want to create > Click Sign up.
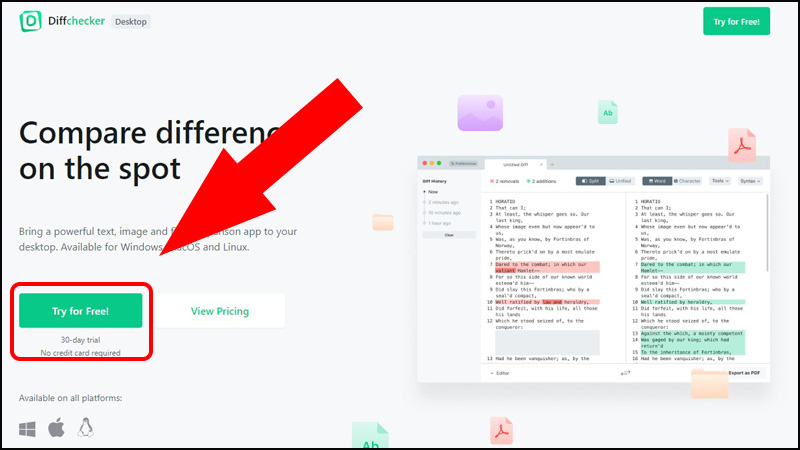
When you finish creating an account, there will be a trial registration (like the photo) and you click Try for free, the software will automatically download you to install as usual.
Comparison using CopyLeaks
CopyLeaks is simple to use and saves you more time than manual methods. This tool supports many document formats such as pdf, html, doc, txt, rtf, ppt files,…
You will follow these instructions:
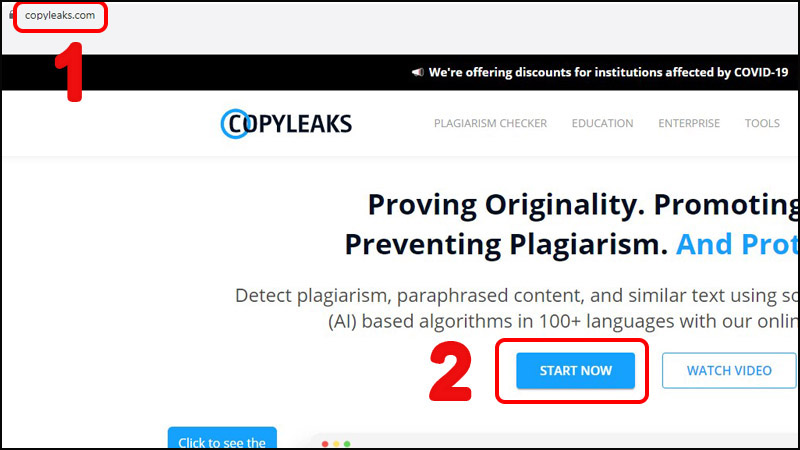
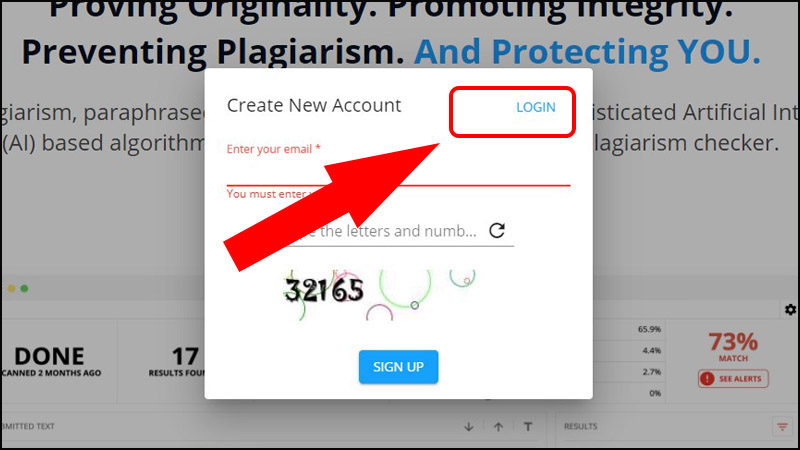
– Step 1: Access the tool HERE > Click START NOW.
Perform Login if you already have an account or register if you don’t have one. Remember to access mail to Active account!
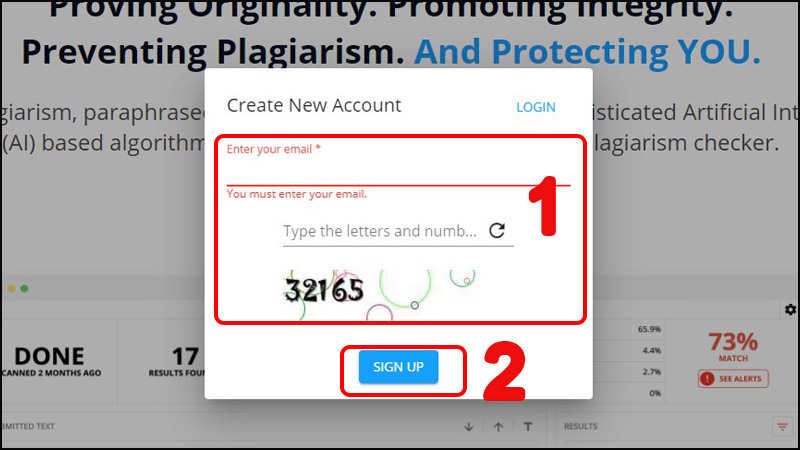
If you log in, click LOGIN and enter the email with the password!
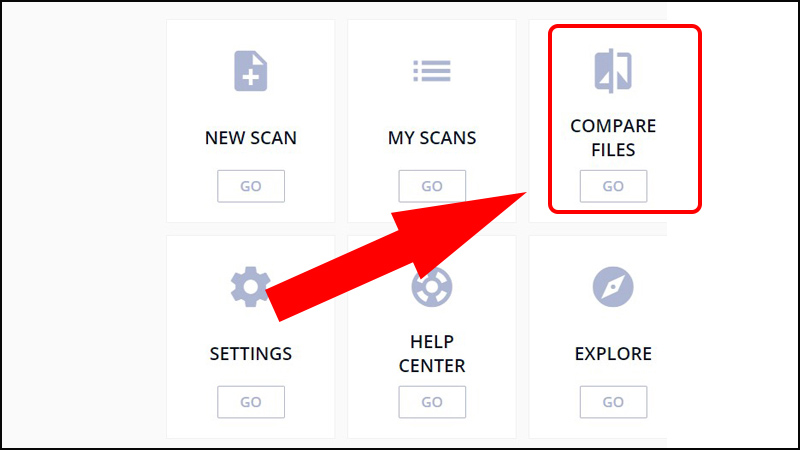
– Step 2: Click the COMPARE FILES button > Select GO.
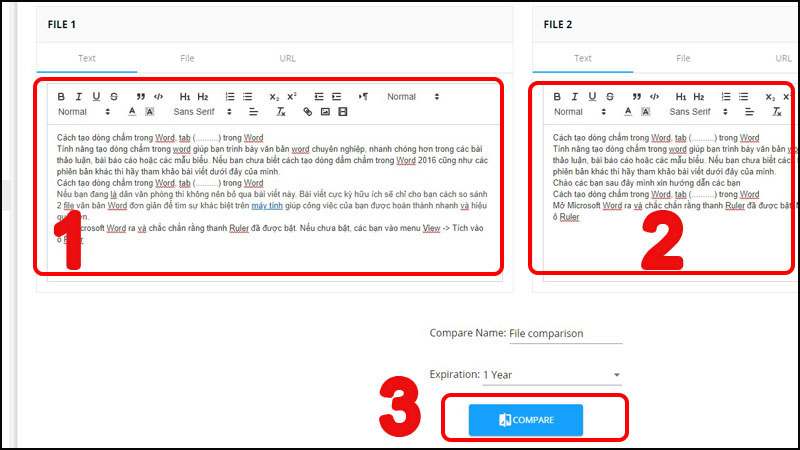
– Step 3: Copy and paste the contents of the 2 texts you want to compare into the > Click COMPARE.
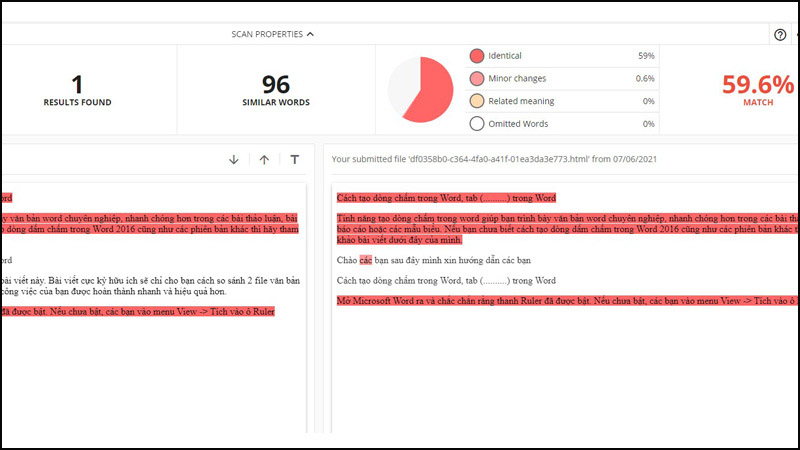
– Step 4: Wait a few seconds, the screen will display colored text (red) showing the difference of 2 texts.
This article provides detailed instructions on how to compare two Word documents to find the differences easily. You can apply these steps to all versions of Word on your laptop. Hope to see you in the next articles!