How to insert a vertical line in word 2010, 2013, 2016… Effortlessly

How to insert a vertical line in word? Drawing a straight line in Word might seem simple with pen and paper, but can you do it using your mouse and keyboard? Let’s explore drawing straight lines in Word. Get started now!

This guide is demonstrated on a Windows laptop with Word 2016. You can apply similar steps on Word 2007, 2010, 2013, 2019 versions, and MacOS.

I. When You Need to Draw a Straight Line in Word

How to insert a vertical line in word: 

  1. To separate two contents.
  2. When creating important documents or papers.
  3. For mathematical purposes.

II. How to Draw a Straight Line in Word

How to insert a vertical line in word: 

1. Drawing a Straight Line

Step 1: Open Word > Click on the Insert tab > Select Shapes.
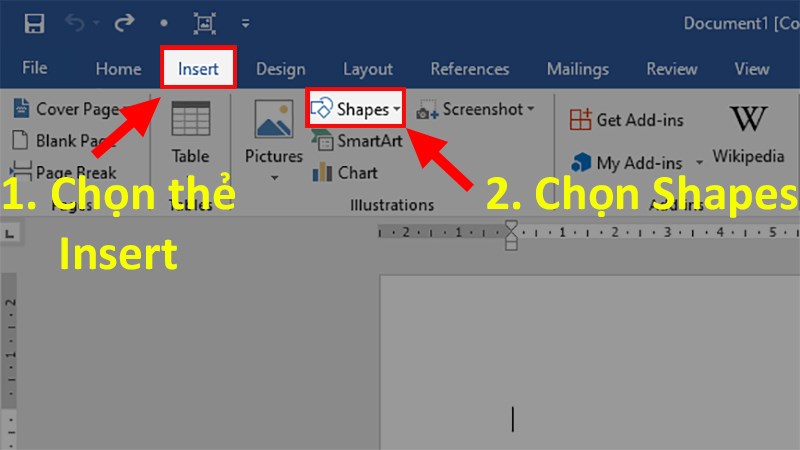
Open Word > Click on the Insert tab > Select Shapes.

Step 2: Under Line, click on the straight line shape.
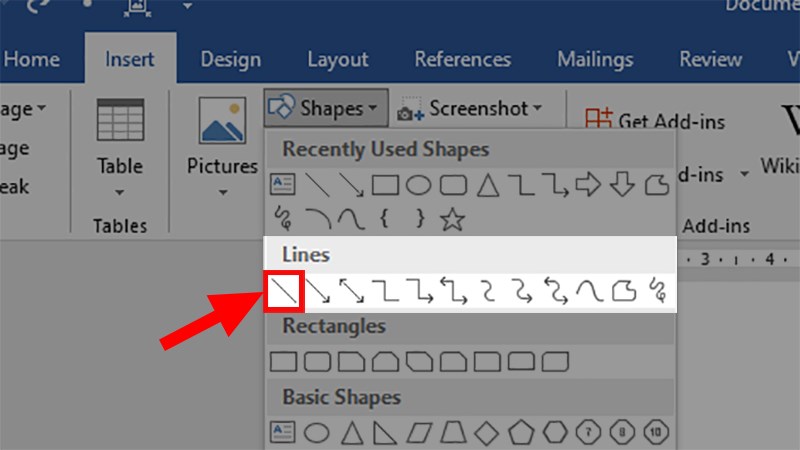
Under Line, click on the straight line shape.

Step 3: Position and start drawing.

Tip: For a perfectly straight line, hold down the Shift key while drawing.

2. Editing the Line

Step 1: Right-click on the drawn line > Choose Format Shape.
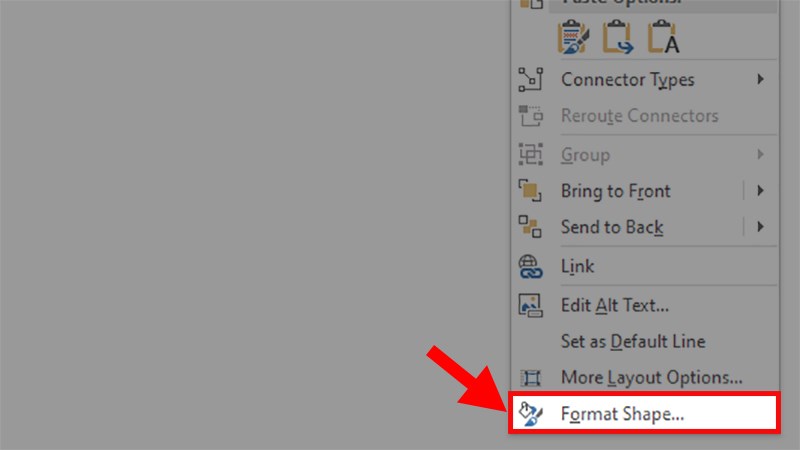
Right-click on the drawn line > Choose Format Shape.

Step 2: In the Format Shape window on the right, customize as follows:

  • Color: Choose line color.
  • Transparency: Adjust line transparency (higher values make it more transparent).
  • Width: Select line thickness.
  • Compound type: For comparing two lines.
  • Dash type: Choose line style.
  • Begin Arrow type: Customize the line’s starting shape.
  • Begin Arrow size: Adjust starting shape size.
  • End Arrow type: Customize the line’s ending shape.
  • End Arrow size: Adjust ending shape size.
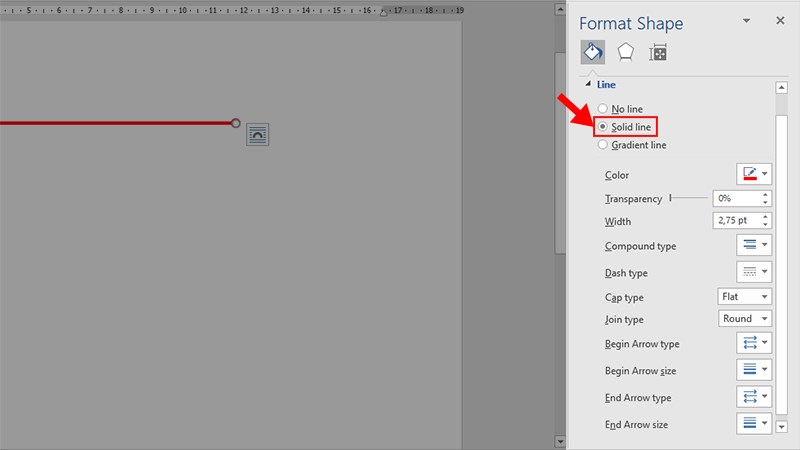
In the Format Shape window on the right, customize as follows

Step 3: Add a label to the line by selecting the Insert tab.
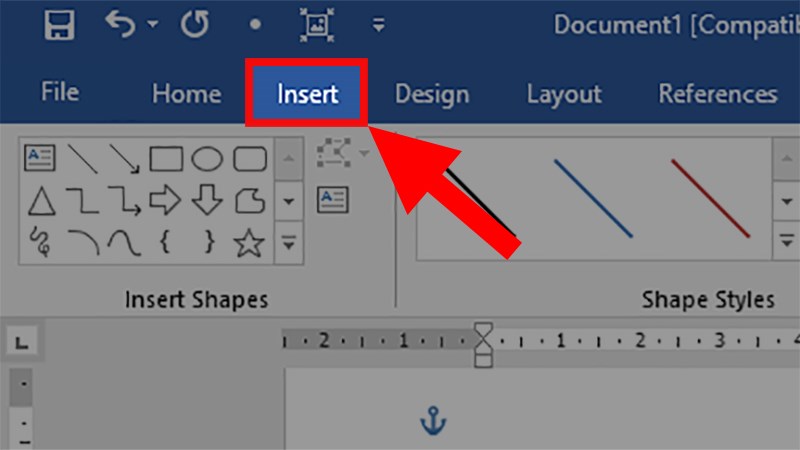
Add a label to the line by selecting the Insert tab.

Step 4: Go to Text > Choose Text Box > Select Simple Text Box style.
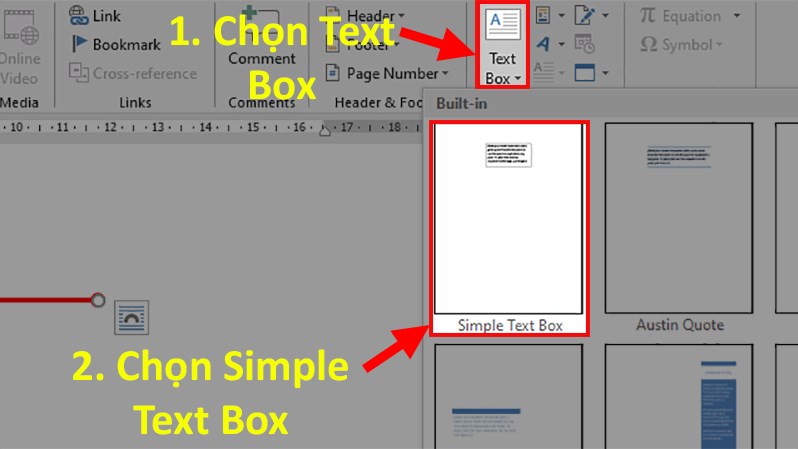
o to Text > Choose Text Box > Select Simple Text Box style.

Step 5: Type the label in the created Text Box.
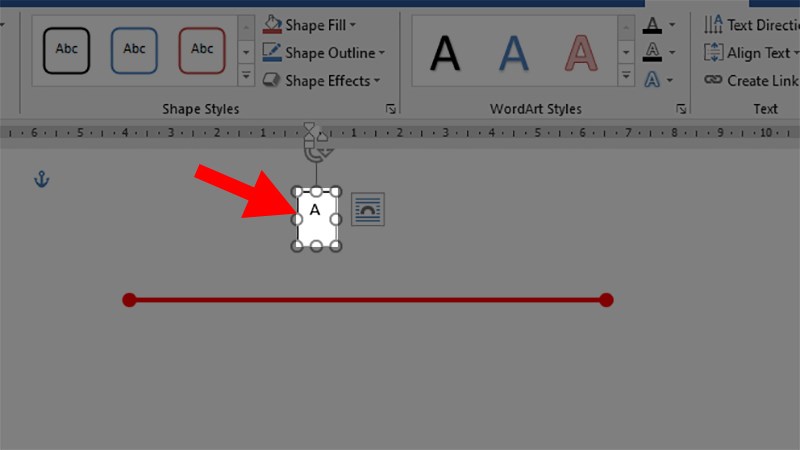
Type the label in the created Text Box.

Step 6: Move the cursor to the Text Box edge until a 4-sided arrow appears.

Step 7: Right-click > Choose Format Shape.
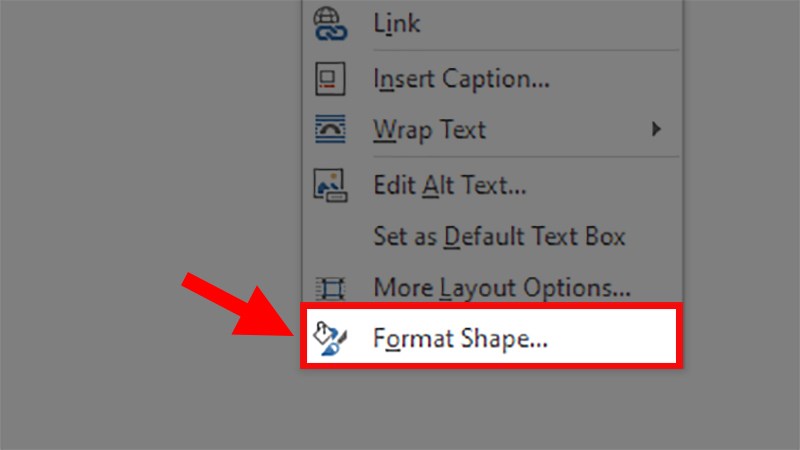
Right-click > Choose Format Shape.

Step 8: In the window that appears on the right, go to Text Outline > Check No line.
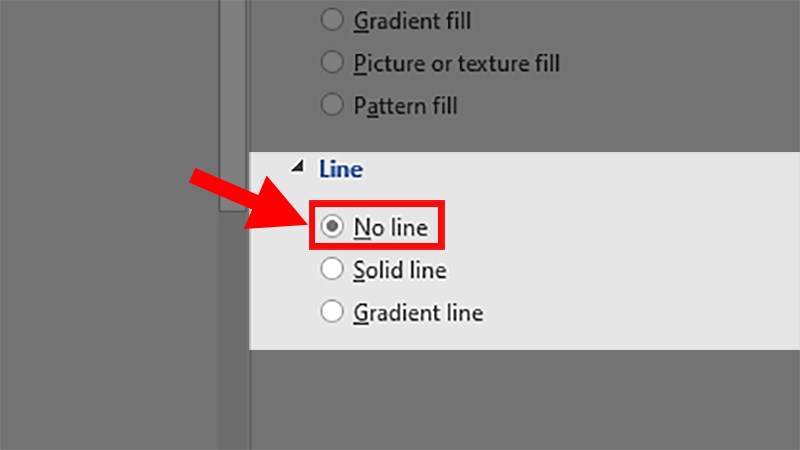
In the window that appears on the right, go to Text Outline > Check No line.

Step 9: Go to Text Fill > Check No line.
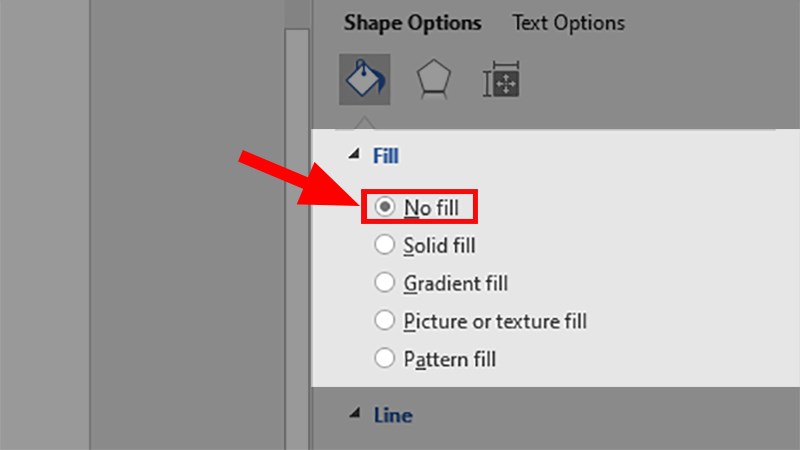
Go to Text Fill > Check No line.

Step 10: Move the characters to the line’s start and end to complete.
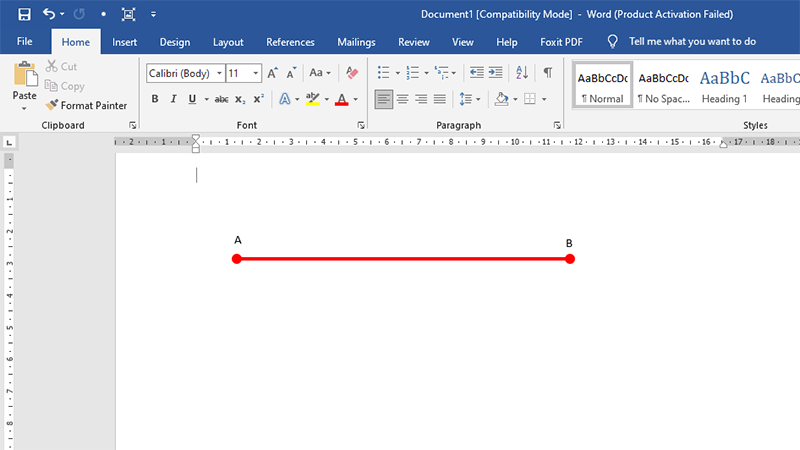
Move the characters to the line's start and end to complete.
Move the characters to the line’s start and end to complete.

3. Moving the Straight Line

Tip: To move a straight line, group the characters and lines together. Refer to the linked guide to learn how to group in Word!

Related Posts

Cách cài đặt font chữ mặc định cho Word đơn giản, dễ thực hiện nhất 1

Cách cài đặt font chữ mặc định cho Word đơn giản, dễ thực hiện nhất

Trong quá trình soạn thảo văn bản, việc sử dụng một font chữ nhất quán và phù hợp không chỉ tạo nên tính chuyên nghiệp cho tài…

Giải Pháp Hiệu Quả Khi File Word Không Cho Chỉnh Sửa 5

Giải Pháp Hiệu Quả Khi File Word Không Cho Chỉnh Sửa

Trong quá trình sử dụng Microsoft Word, không ít người dùng gặp phải tình trạng file Word không cho chỉnh sửa, gây ra nhiều phiền toái và…

Khắc Phục Lỗi Ko In Được File Word: Nguyên Nhân và Giải Pháp Hiệu Quả 9

Khắc Phục Lỗi Ko In Được File Word: Nguyên Nhân và Giải Pháp Hiệu Quả

Việc in tài liệu là một phần không thể thiếu đối với dân văn phòng, sinh viên, và học sinh trong quá trình làm việc và học…

Hướng Dẫn Soạn Thảo Nội Quy Phòng Cháy Chữa Cháy File Word Đầy Đủ 13

Hướng Dẫn Soạn Thảo Nội Quy Phòng Cháy Chữa Cháy File Word Đầy Đủ

Phòng cháy chữa cháy (PCCC) là một trong những hoạt động quan trọng, có vai trò thiết yếu trong việc bảo vệ an toàn cho con người…

So Sánh 2 Bản Word Sự Khác Biệt Giữa Word 2016 và Word 2019 17

So Sánh 2 Bản Word Sự Khác Biệt Giữa Word 2016 và Word 2019

Phần mềm xử lý văn bản đóng vai trò quan trọng không chỉ trong công việc mà còn trong học tập. Trong số các phần mềm này,…

Những Cách Tách File Word Thành Nhiều File 22

Những Cách Tách File Word Thành Nhiều File

Microsoft Word là một phần mềm xử lý văn bản được phát triển bởi Microsoft, lần đầu tiên ra mắt vào năm 1983 dưới tên Multi-Tool Word…

Leave a Reply

Your email address will not be published. Required fields are marked *