how to remove indent in word and standard ways to indent bullets

How to remove indent in word? Indenting the first line of paragraphs while composing documents such as theses, essays, contract proposals, or even short stories and writing assignments in Word is highly significant. So, how can you accomplish this? Let’s explore three methods for indenting the first line in Word for all versions!

The article is written on a Windows laptop running Word 2016. Additionally, you can perform these actions on Word versions 2007, 2010, 2013, and 2019, as well as on MacOS with similar steps.

When to indent text in Word?

  • When you edit documents in Word, indentation is required.
  • Indenting text in Word makes your text look better.
  • Attract, create a feeling of wanting to read more for readers.

How to remove indent in word?

Indent bullets with Tabs

  • Pros: Fast, shortcut-only operation.
  • Cons: Can’t adjust the spacing between Tab times.

Step 1: Place  the mouse cursor where you want to indent the bullet, if it is a paragraph, put it at  the beginning of the paragraph.
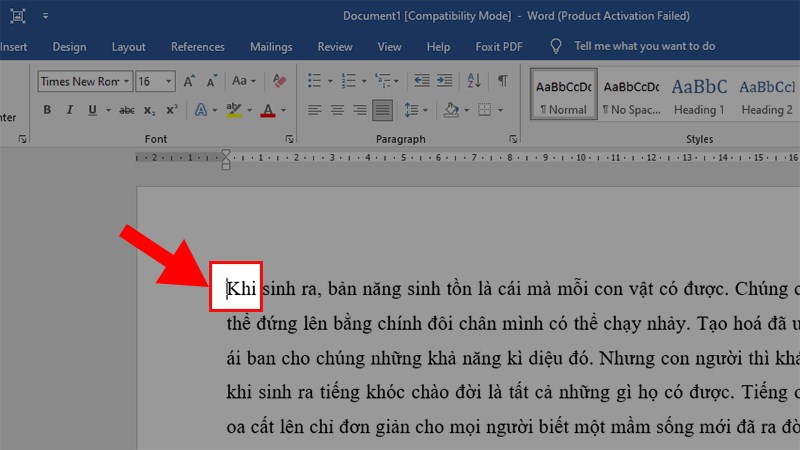
Place  the mouse cursor where you want to indent the bullet, if it is a paragraph, put it at  the beginning of the paragraph

Step 2: Press the  Tab key on your keyboard to indent the line.

Note: If you want the Tab press to return to normal, just press  the Backspace key on your keyboard!

Step 3: If the indent position is not as expected, you can adjust as follows:

Right-click > Paragraph or click the Paragraph arrow icon in the Home toolbar.
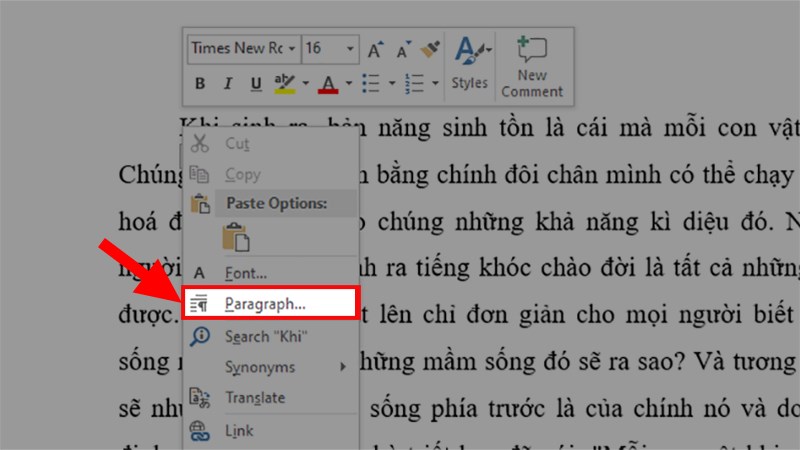
Right-click > Paragraph or click the Paragraph arrow icon in the Home toolbar

The Paragraph dialog box  appears > Click the Tabs item.
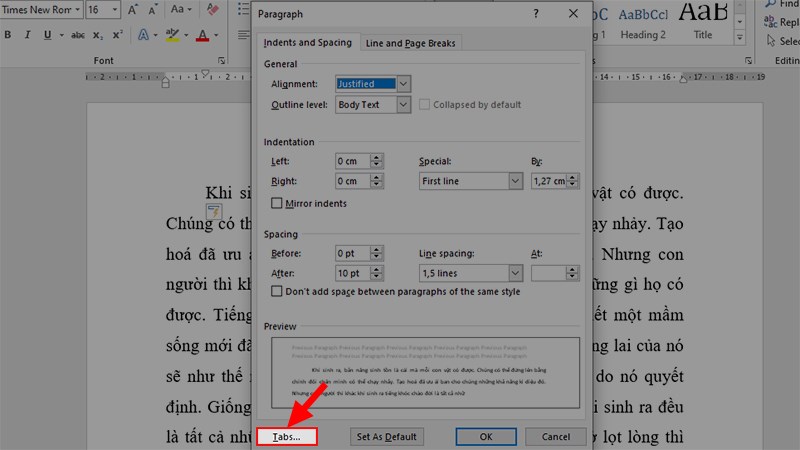
The Paragraph dialog box  appears > Click the Tabs item

The Tabs dialog box appears > under Default tab stops you  enter the distance you want to go backwards > Click OK.
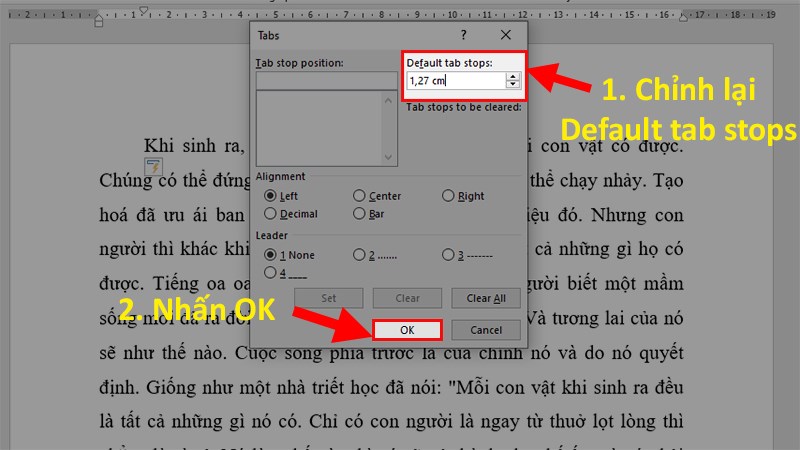
The Tabs dialog box appears > under Default tab stops you  enter the distance you want to go backwards > Click OK.

After the installation is complete, each time you make a Tab on the keyboard, the text will indent according to the distance you want.

Indent bullets with ruler bars

  • Pros: Fast, adjustable distance.
  • Disadvantages: The way is complicated, it is necessary to know the operations on the ruler bar.

Step 1: Place  the mouse cursor where you want to indent the bullet, if it is a paragraph, put it at  the beginning of the paragraph.
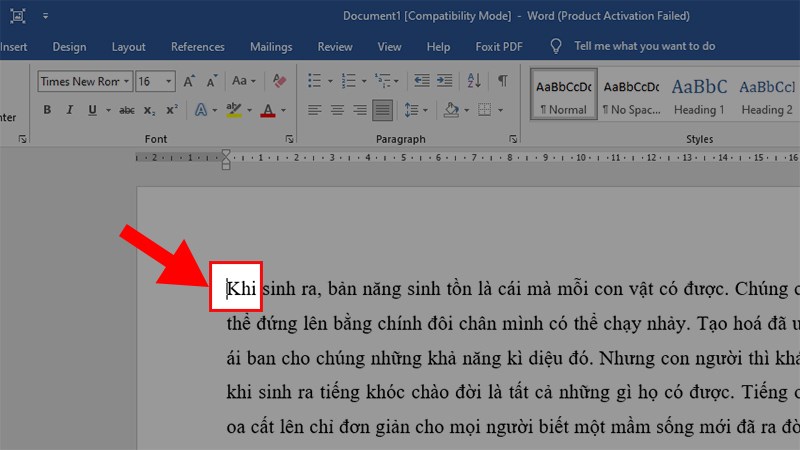
Place  the mouse cursor where you want to indent the bullet, if it is a paragraph, put it at  the beginning of the paragraph

Step 2: Click  on the triangle icon  on  the ruler bar and drag right or left to align the margins.

Indent bullets with Paragraph

  • Pros: Distance adjustable accurately.
  • Cons: Many complicated operations.

Step 1: Select  the entire paragraph  > Right-click > Select Paragraph.
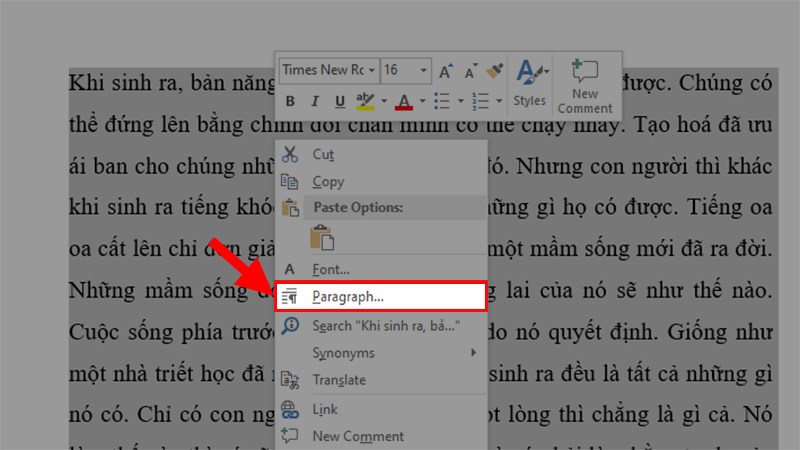
Select  the entire paragraph  > Right-click > Select Paragraph

Step 2: In the Paragraph dialog box > Go to Special > Select First line.
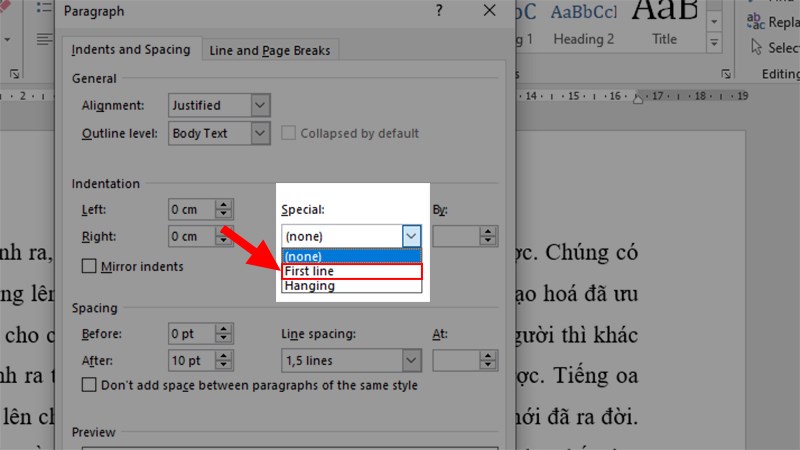
In the Paragraph dialog box > Go to Special > Select First line

Step 3: Go to the By >  Enter 1.27 > Click OK.
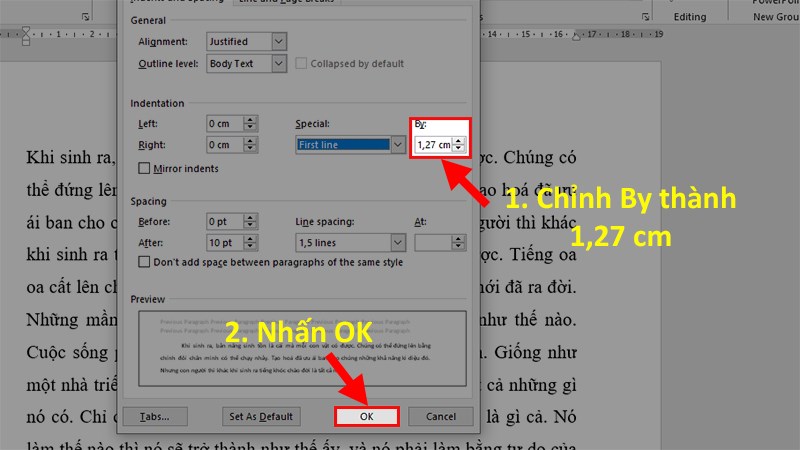
Go to the By >  Enter 1.27 > Click OK.

Step 4: All results are indented.
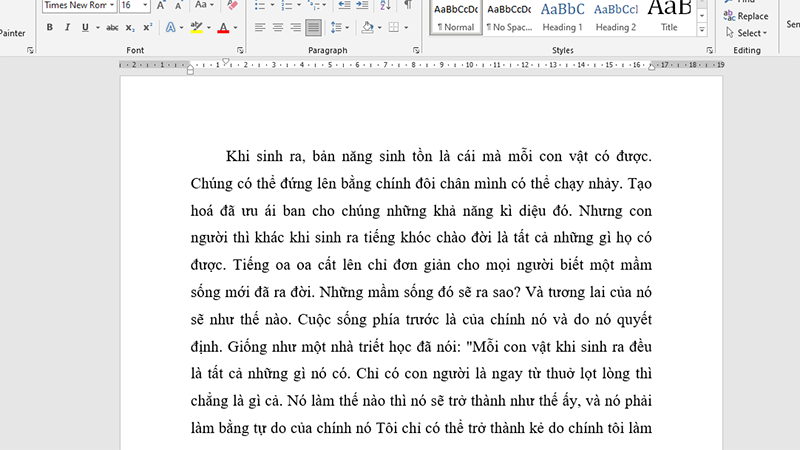
All results are indented

How to remove indent in word? And those are three methods that can help you indent the first line in Word, which are not only simple but also highly effective. If you have any questions about the process, please leave a comment below. Hopefully, this article proves to be helpful for you. Wishing you success!

Related Posts

Cách cài đặt font chữ mặc định cho Word đơn giản, dễ thực hiện nhất 1

Cách cài đặt font chữ mặc định cho Word đơn giản, dễ thực hiện nhất

Trong quá trình soạn thảo văn bản, việc sử dụng một font chữ nhất quán và phù hợp không chỉ tạo nên tính chuyên nghiệp cho tài…

Giải Pháp Hiệu Quả Khi File Word Không Cho Chỉnh Sửa 5

Giải Pháp Hiệu Quả Khi File Word Không Cho Chỉnh Sửa

Trong quá trình sử dụng Microsoft Word, không ít người dùng gặp phải tình trạng file Word không cho chỉnh sửa, gây ra nhiều phiền toái và…

Khắc Phục Lỗi Ko In Được File Word: Nguyên Nhân và Giải Pháp Hiệu Quả 9

Khắc Phục Lỗi Ko In Được File Word: Nguyên Nhân và Giải Pháp Hiệu Quả

Việc in tài liệu là một phần không thể thiếu đối với dân văn phòng, sinh viên, và học sinh trong quá trình làm việc và học…

Hướng Dẫn Soạn Thảo Nội Quy Phòng Cháy Chữa Cháy File Word Đầy Đủ 13

Hướng Dẫn Soạn Thảo Nội Quy Phòng Cháy Chữa Cháy File Word Đầy Đủ

Phòng cháy chữa cháy (PCCC) là một trong những hoạt động quan trọng, có vai trò thiết yếu trong việc bảo vệ an toàn cho con người…

So Sánh 2 Bản Word Sự Khác Biệt Giữa Word 2016 và Word 2019 17

So Sánh 2 Bản Word Sự Khác Biệt Giữa Word 2016 và Word 2019

Phần mềm xử lý văn bản đóng vai trò quan trọng không chỉ trong công việc mà còn trong học tập. Trong số các phần mềm này,…

Những Cách Tách File Word Thành Nhiều File 22

Những Cách Tách File Word Thành Nhiều File

Microsoft Word là một phần mềm xử lý văn bản được phát triển bởi Microsoft, lần đầu tiên ra mắt vào năm 1983 dưới tên Multi-Tool Word…

Leave a Reply

Your email address will not be published. Required fields are marked *